
Thanks for stopping by today! Recently I partnered with Kaboodle Kitchen to design some overhead cupboards for my laundry. I knew exactly how I wanted it to look and I knew this would be a reasonably easy DIY project my husband and I could tackle. I have been in my house for 5 years and …

Thanks for stopping by today!
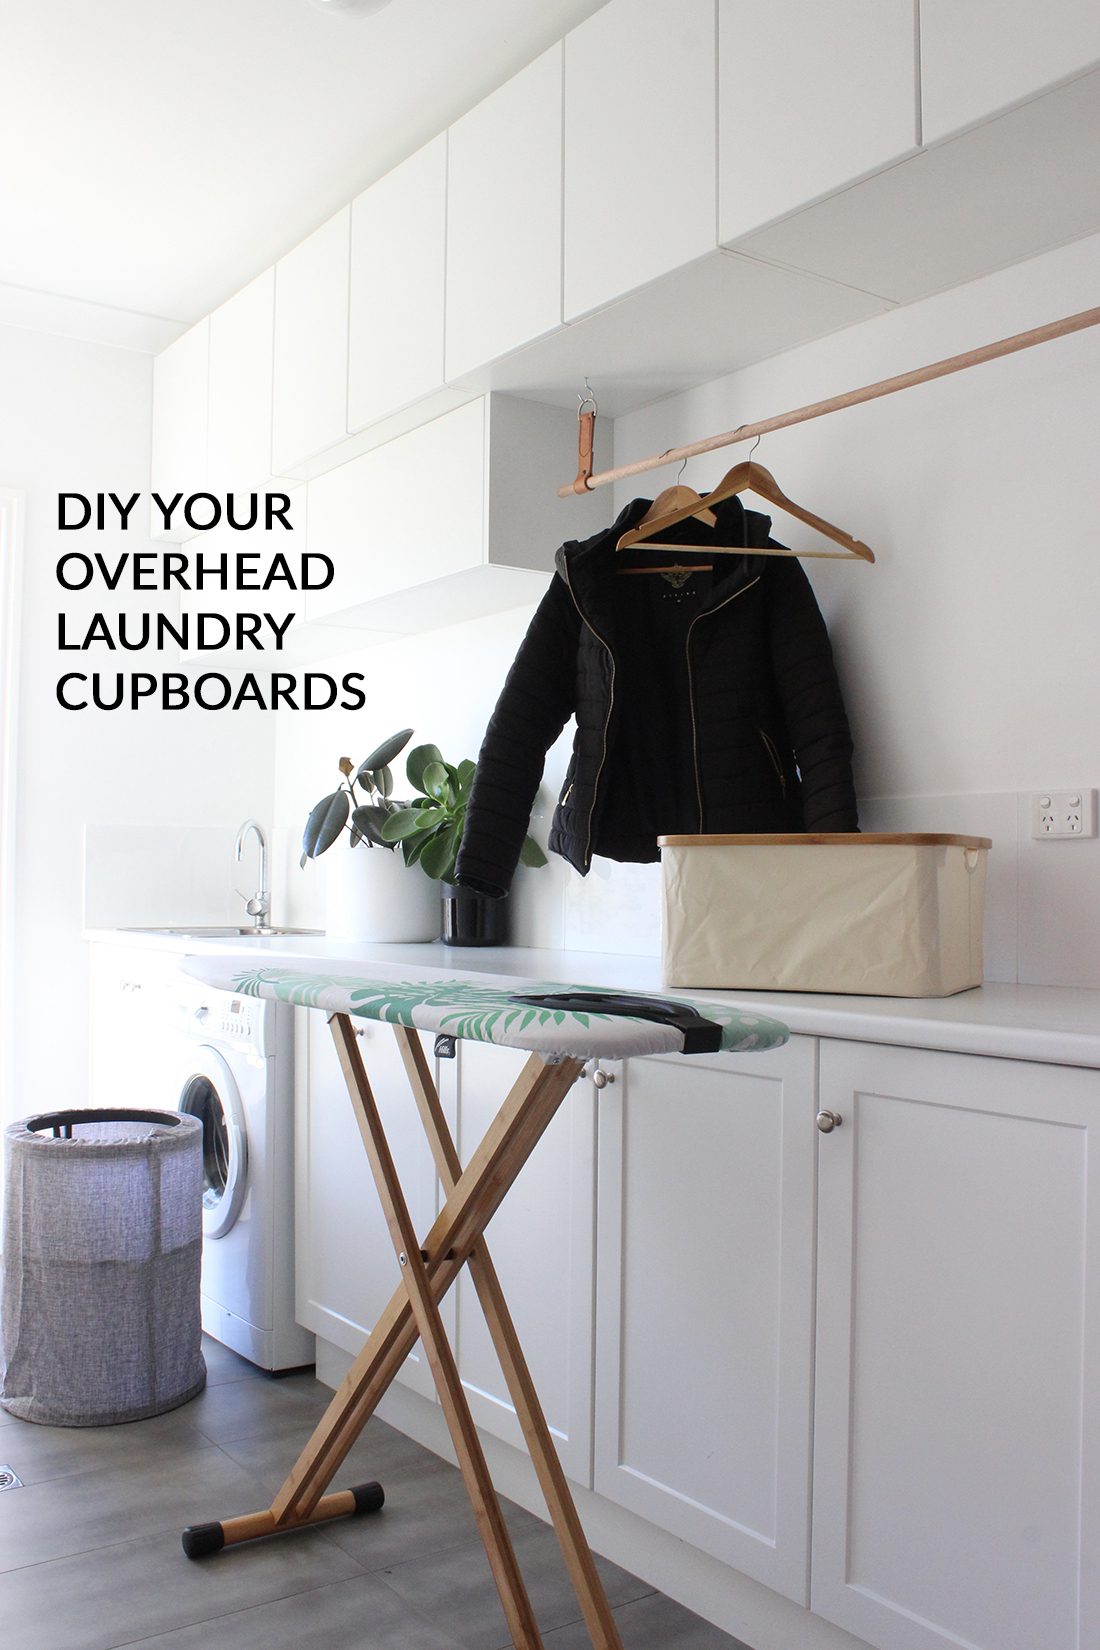
Recently I partnered with Kaboodle Kitchen to design some overhead cupboards for my laundry. I knew exactly how I wanted it to look and I knew this would be a reasonably easy DIY project my husband and I could tackle.
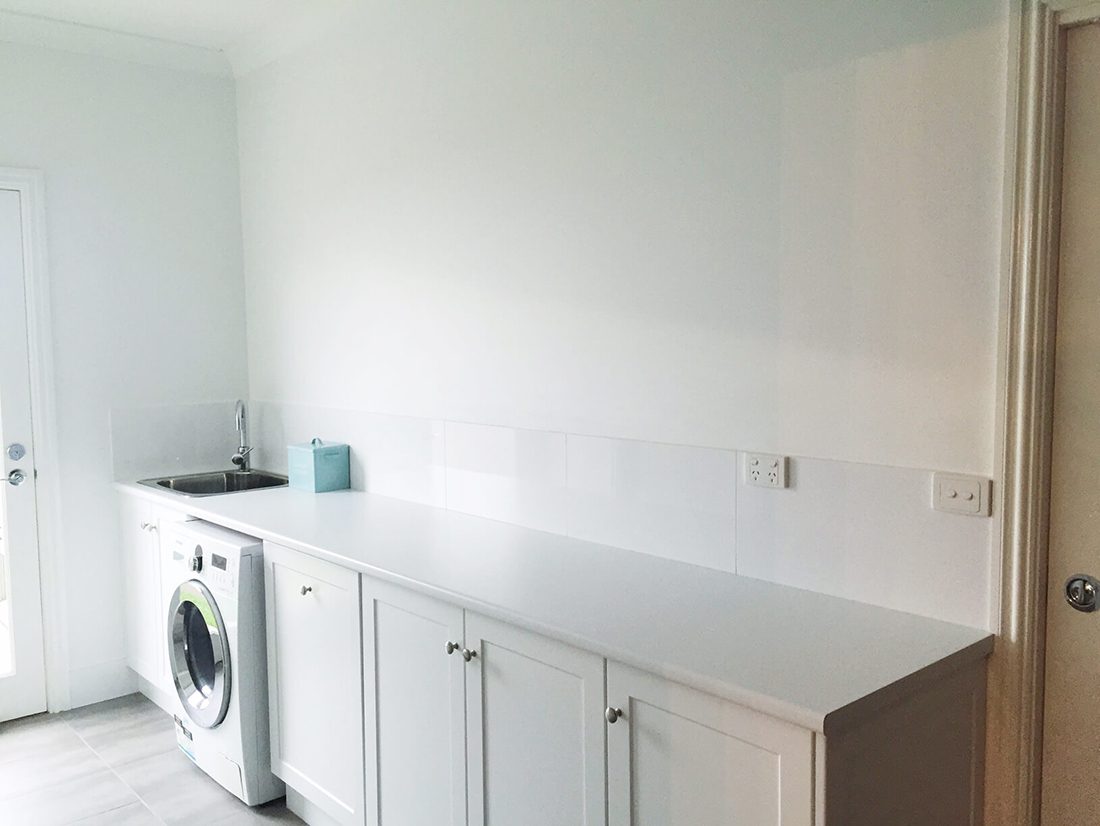
I have been in my house for 5 years and at the time of building I couldn’t afford extra cupboards in this space. The budget had run out! But it’s a huge room and always looked unfinished without anything up top. Here’s the before photo…
Plan
Below is the sketch I drew. I had it all in my mind and knew how it would work. I shared this with the team at Kaboodle Kitchen. They were excellent and so helpful! They understood exactly what I needed.

They were spot on with their design recommendation and gave me a much better idea on how the overhead cupboards would work.
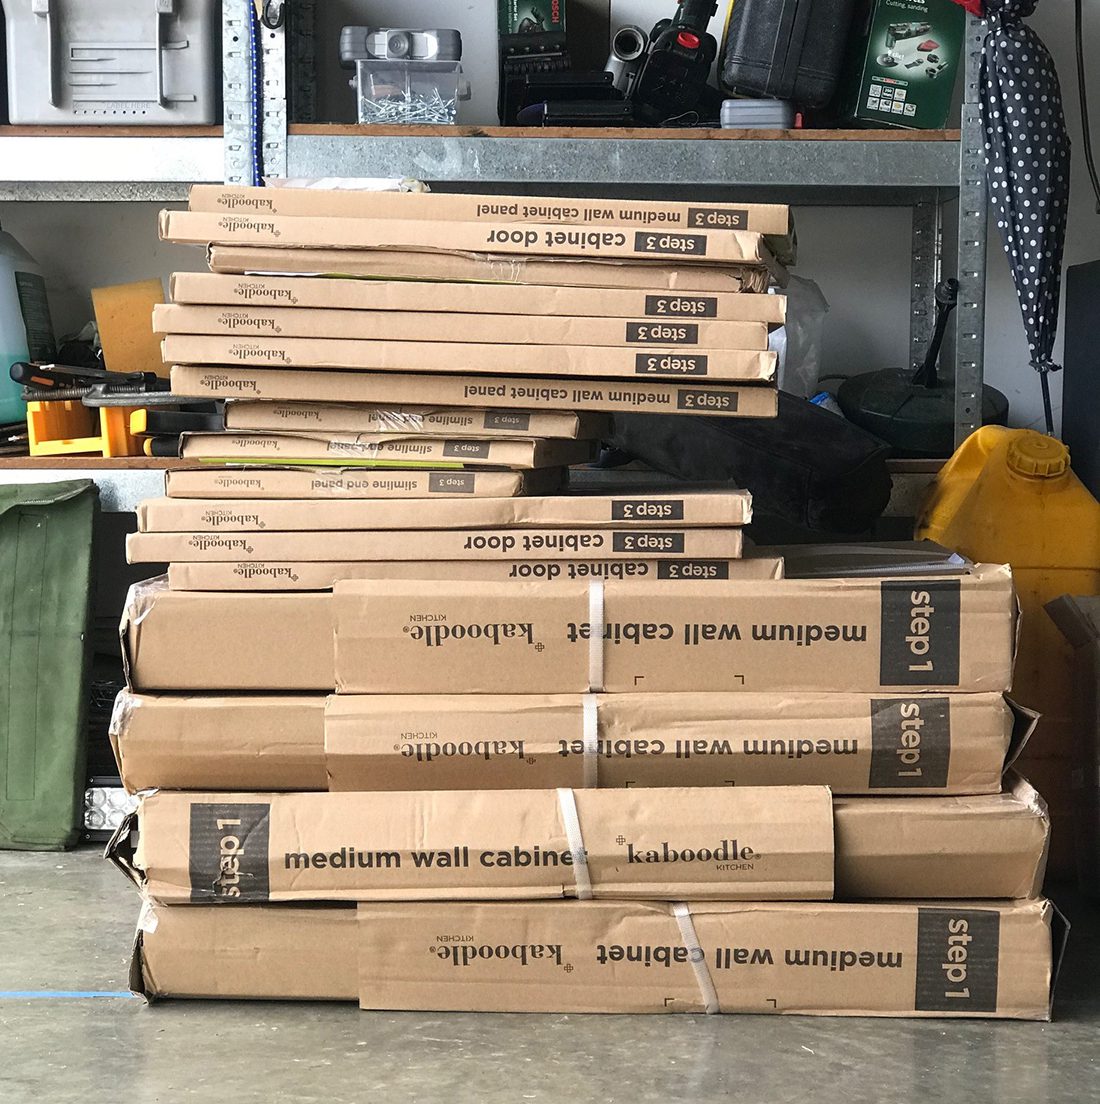
Cut to measure cabinets and doors were applied for this design, to ensure the perfect fit for my space (this was great as the widths could be adjusted to suit)!
Cut to measure medium wall cabinets were also used to create this look and to maximise space – this new range is deeper the standard wall cabinets!
Select
Once the design was finalised, I headed to Bunnings to decide on the colour and finish of the cupboards.

My original base cupboards do have a shaker style profile, but it wasn’t exactly the same as Kaboodle’s, so I thought it was better to choose a simple modern profile, which wouldn’t make it look odd. I grabbed a couple of colour samples too because I had to match the existing white.

I decided on Vanilla Essence in a modern profile and then I was ready to get cracking with it all! Kaboodle made up my cabinetry and sent everything ready to go!
Create
Now, I know you’re thinking OMG that’s a lot of flat-pack! I thought that too and was really stirring my husband about the job ahead haha. But once we looked at them we realised they were clearly marked with easy instructions and everything we needed was included.

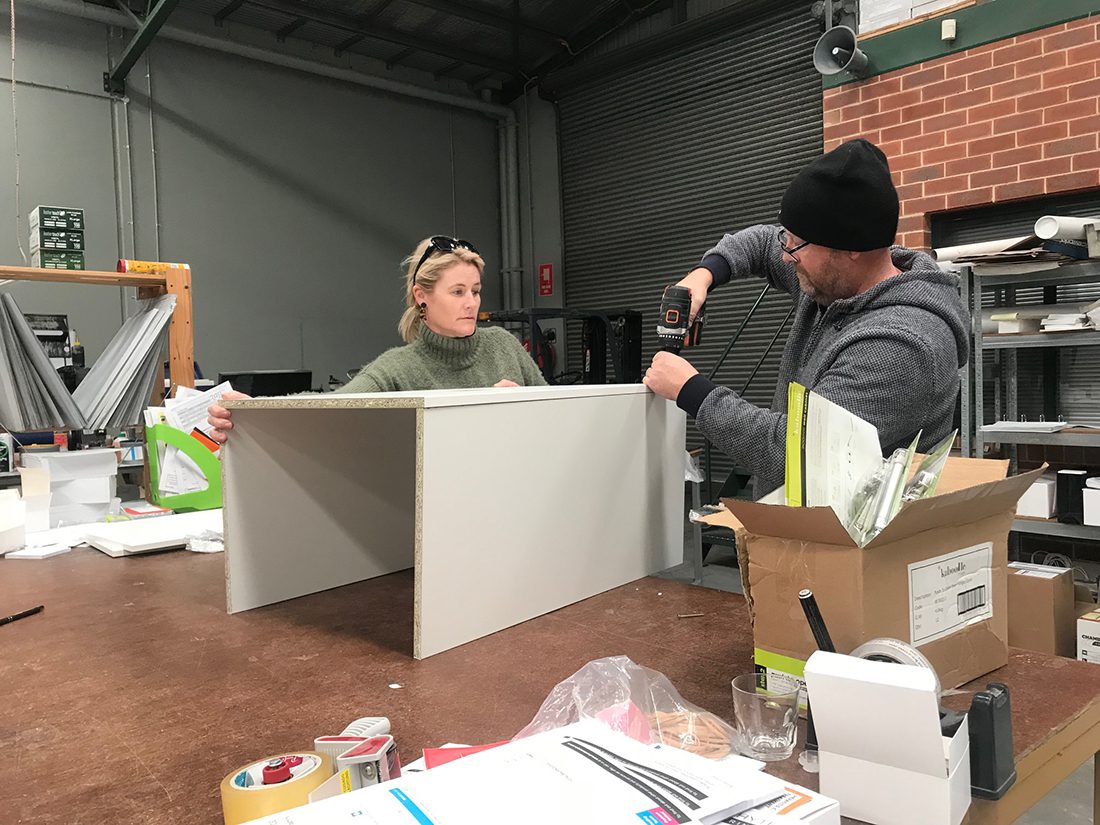
Following instructions and building all the boxes, which will be put together to make a bank of cupboards.

You’ll need to find the studs in your walls. You can’t just attach the cupboards anywhere because they will fall down. We have a stud-finder which we purchased from Bunnings. It will beep and light up to tell us where these studs are. Mark them clearly. TIP – hammer a small nail in to be sure there is a stud. You’re covering these up anyway.

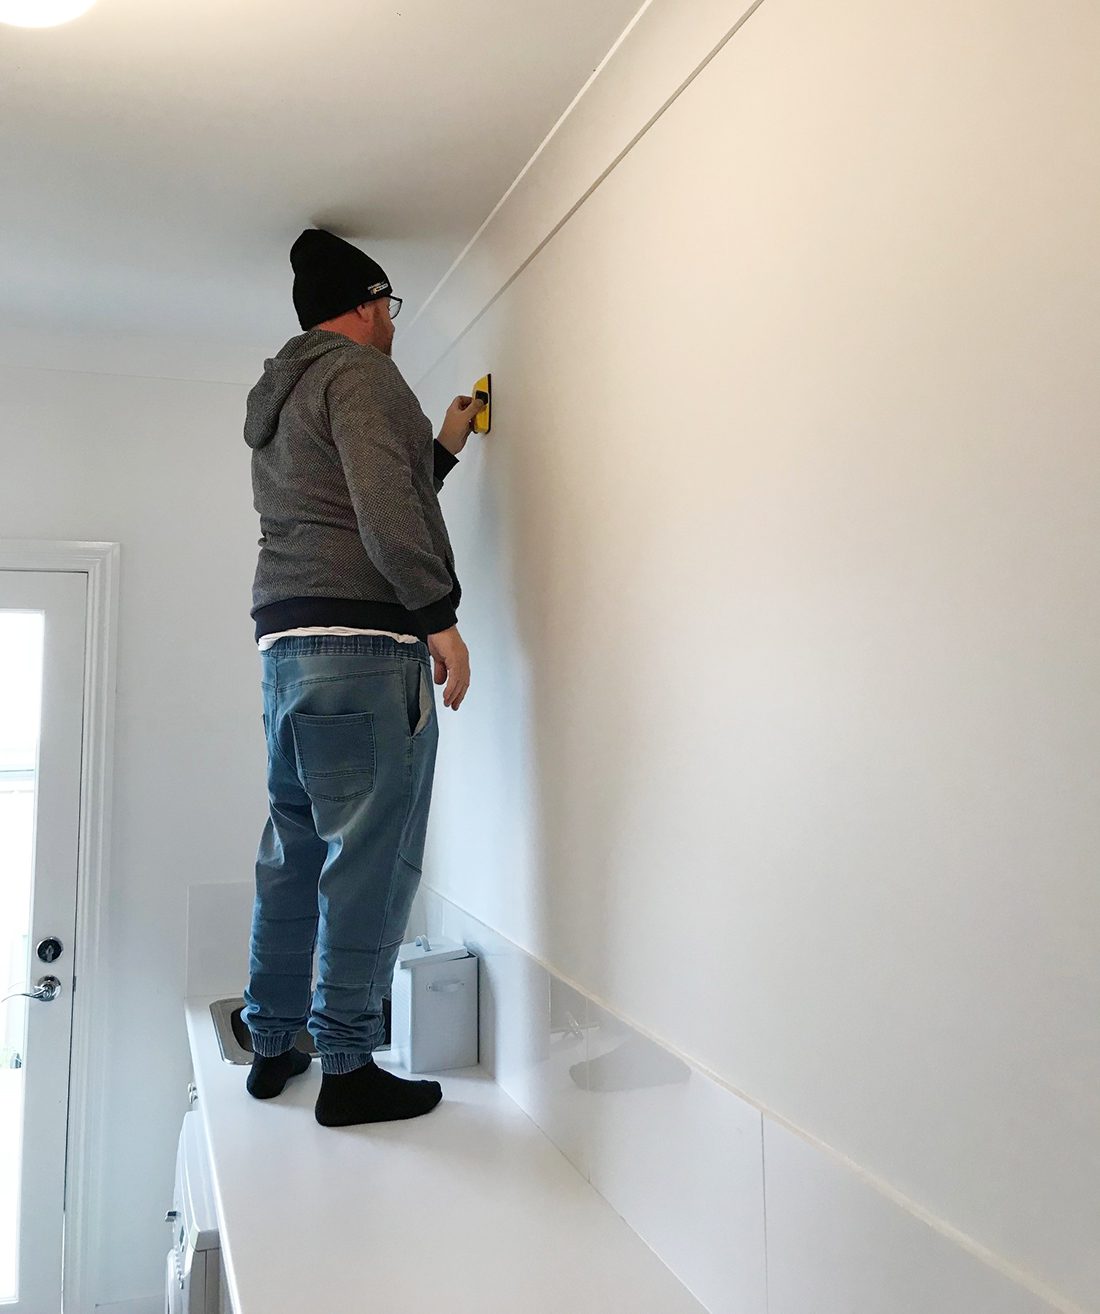
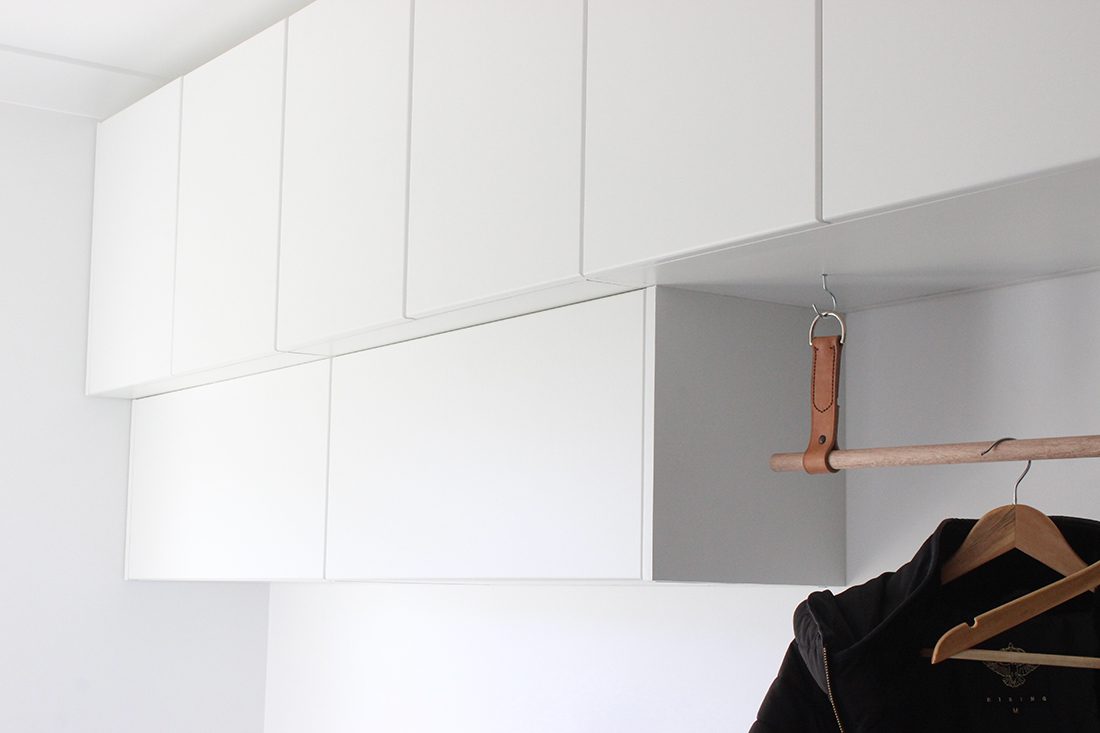
I got the job of holding and balancing these over my head while my husband drilled them to the studs. We pushed them up as high as possible to sit right up against the existing cornice.

On went the hinges then doors. The instructions will tell you how to add these, and adjust to make sure they are straight and fitting properly. I wanted push to open doors (no handles) so this meant the hinges would be spring-loaded and little catchers would need to be placed inside the doors to make sure they lock closed. The bottom row of slimline cabinets have struts so they open upwards.
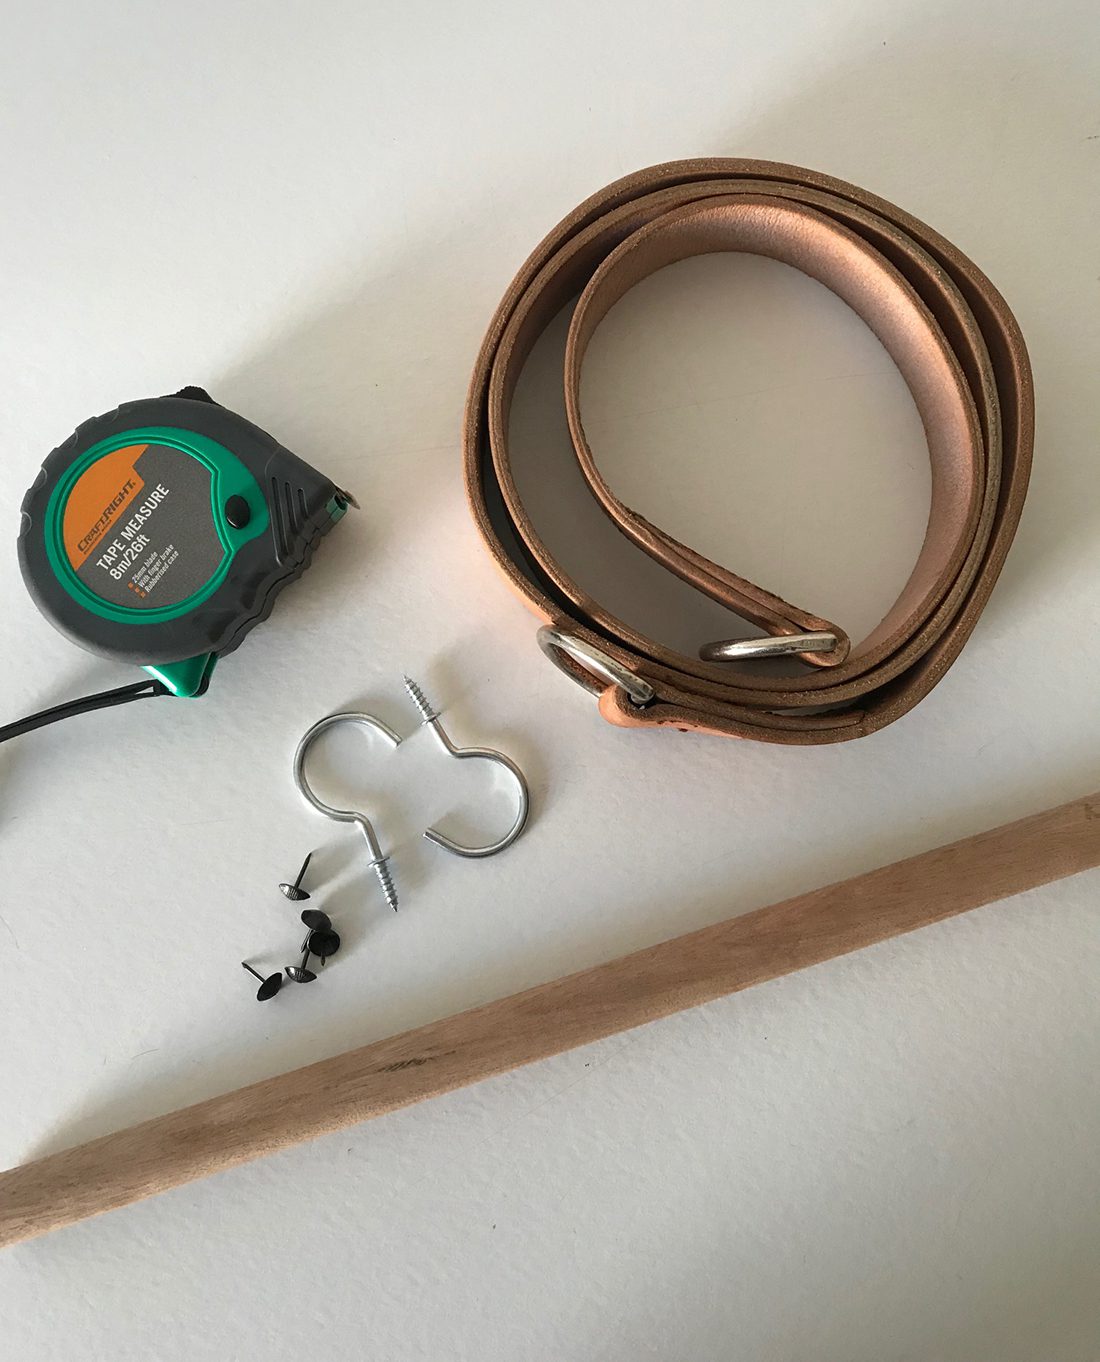
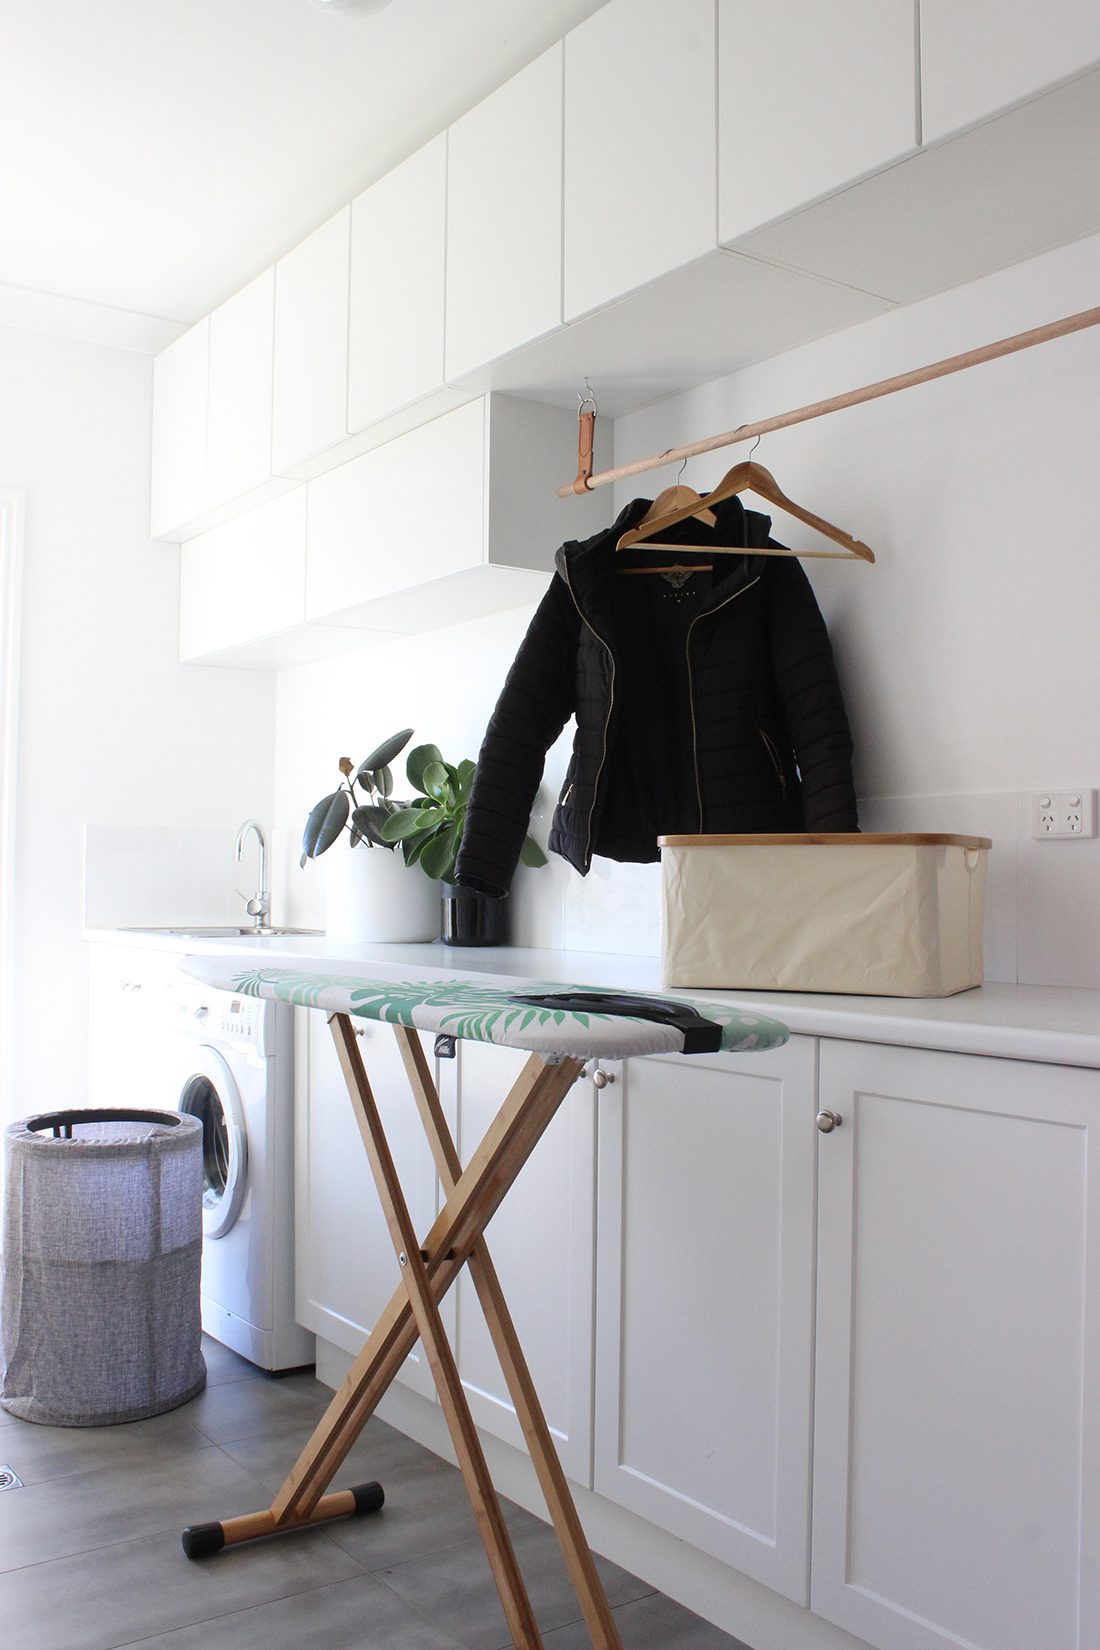
To finish the look off I wanted a hanging rod underneath. You can buy metal ones from Bunnings with brackets but I wanted something a little different. I wanted to use leather but didn’t know where to buy some locally so I put a call out on our local Facebook Buy Swap Sell page and a guy sold me this huge piece with fancy buckles for $5! I think it’s used for horses? Anyway, I couldn’t believe my luck! All I had to buy was a piece of dowel, some hooks to hang it off and a couple of studs to create the loop on the bottom. You just push the little black studs threw and hammer them over on the back. So easy.

Enjoy
Now my laundry looks one hundred times better and is actually finished. This project took us a full day to complete as it was a big task and you will need someone to help you do it. It wasn’t hard at all, it was a little bit time consuming to get all the parts built and adjusted to sit properly. I couldn’t be happier though.
If you want to check out Kaboodle’s full DIY range go here.
What do you think? Something you could do too? Maybe to your laundry or kitchen?
♥ KC.
The overhead cupboards were gifted to me from Kaboodle in exchange for this blog post. I wasn’t paid any money. The rough cost of the project was $2,300 (custom made).


Comments
Ingrid
Great job and looks fabulous Katrina. I need this in my laundry and kitchen. Thanks ?
Ally
Hey Katrina,
Laundry looks great! How high are the top cupboards? Any wasted shelves as too high? We are thinking about doing this in our laundry also.
Thanks!