Sponsored by Masters and Nuffnang Hi there! Thanks for coming by to see Part 2 of my floating shelf makeover. Thanks to Masters Home Improvement, they set me a DIY challenge and this is what my husband I decided to do - it was not difficult and I am positive you'll be able to do …
Sponsored by Masters and Nuffnang
Hi there! Thanks for coming by to see Part 2 of my floating shelf makeover. Thanks to Masters Home Improvement, they set me a DIY challenge and this is what my husband I decided to do – it was not difficult and I am positive you’ll be able to do it too!
Here’s what I wanted to do:
• I needed 2 big floating shelves under a tv area between 2 storage cupboards.
• I wanted to make a frame to sit inside the space, and plaster (gyprock) the entire frame. This would mean square setting the corners.
• The frame/plaster idea would give me the width and length I required, plus be easy to mount to the wall and I would not need any brackets.
Are you with me? Ok, let’s see the progress photos below…
Masters offers over 35,000 products including items from:
1. Building, Timber & Tools
2. Electrical & Hardware
3. Decorating Lighting & Fans
4. Flooring & Tiles
5. Kitchen & Appliances
6. Bathroom & Plumbing
7. Garden & Outdoor Living
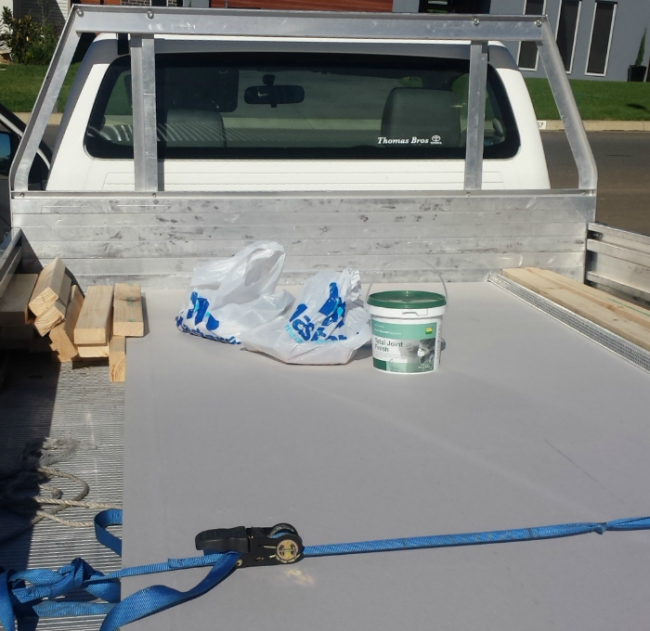
We decided to hang around the building and timber products for this job…
We bought:
– Timber for the frame
– Plaster sheets
– External corners for the plaster
– Plaster cement
– Screws, nails
– Sanding block
– Paint
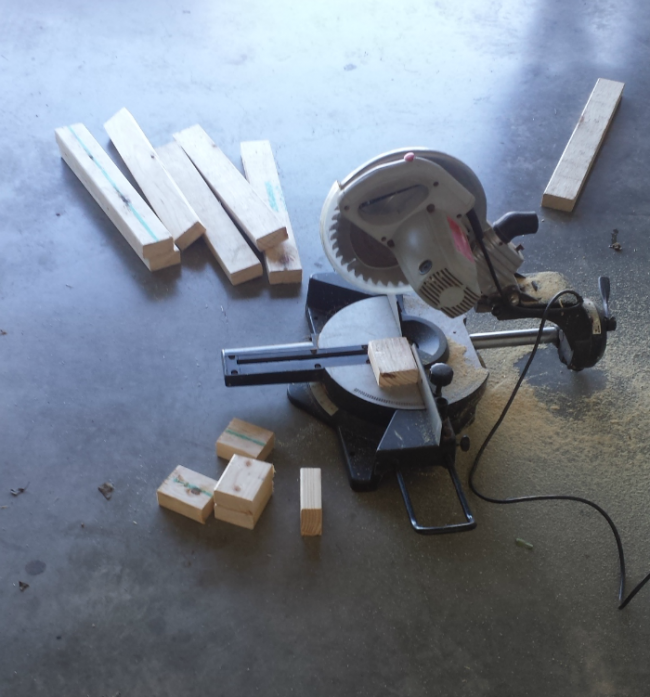
Masters pre-cut all our long pieces of timber for the outside part of the frame. We kept the off-cuts and cut those to size when we got home. So, just take your measurements to Masters if you don’t have the tools to cut yourself – they’ll do it all for you!
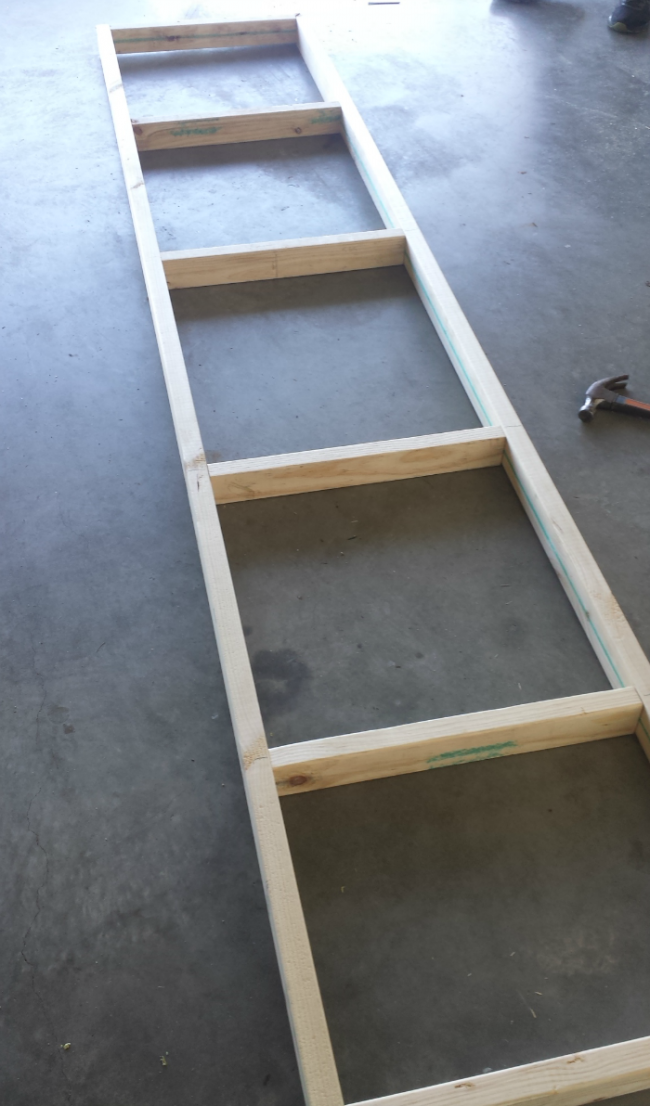
TIP!
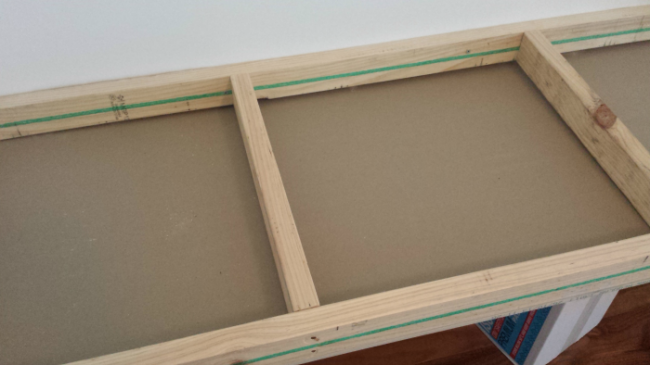
You must put the bottom piece of plaster on before you mount it to the wall or you’ll never get it on. Just use your frame to lay on the plaster and score it with a knife and break the plaster off. This is really easy. It doesn’t matter if the edges are a little ratty because you’re going to plaster them. Just nail the plaster to the frame.
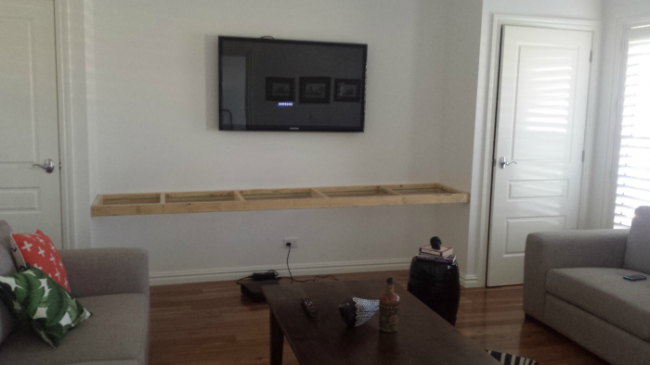
We have a stud-finder so when it came to mounting the frame in to the wall, we obviously found the studs and hit the frame in to those.
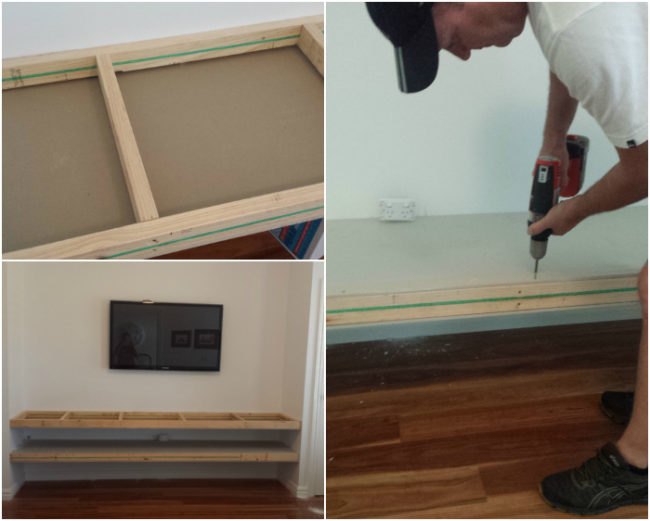
As you can see in the above photos, we put the top piece of plaster on before we mounted the top shelf in to the wall.
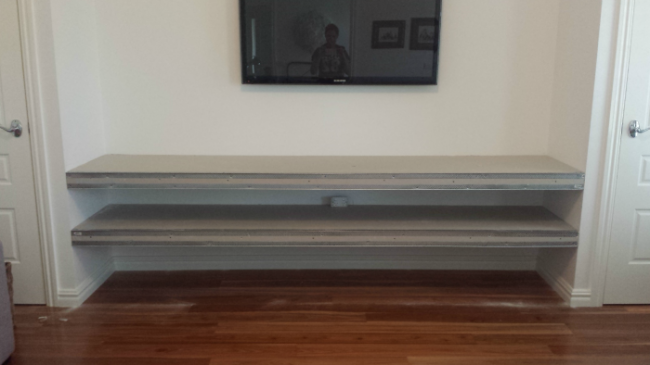
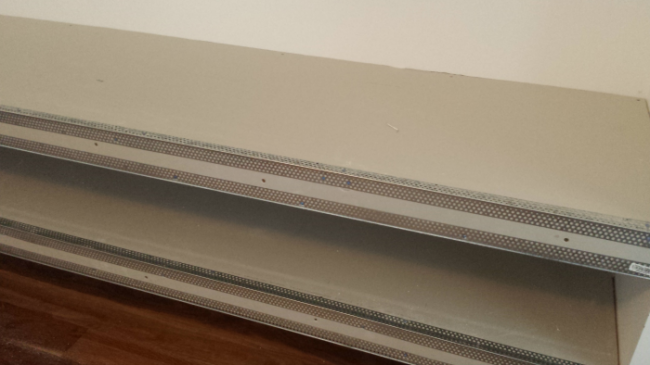
On go the external corner brackets. They were really long, so we used a pair of tin snips to cut them to size. They are then just nailed in to the plaster. This will give you a nice neat edge!
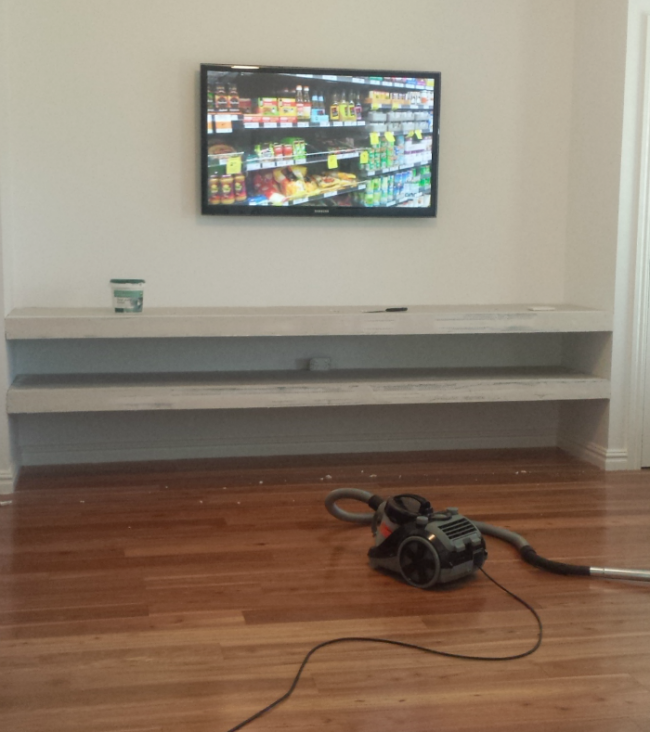
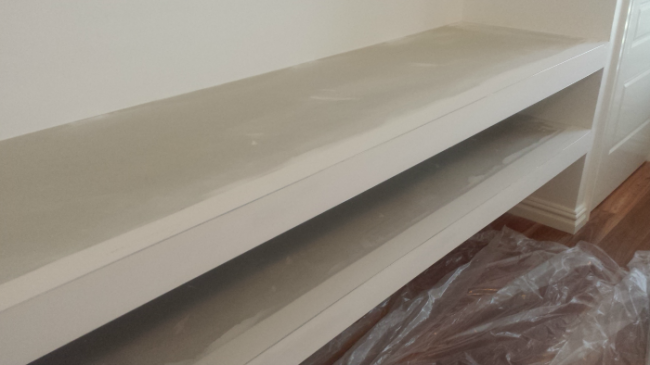
… And here are the shelves after they’ve had the plaster troweled on. I must admit I got out of doing this part! My husband wouldn’t let me near it haha! He is a perfectionist so I let him do this quietly on his own whilst I attended to children. We did NOT hire a plasterer! Truly, it wasn’t hard… just a bit of patience and take your time smoothing it on. It had about 3 coats. So the first one was a light coat and then it got thicker until you couldn’t see the external metal corners. Then it got a light sand so it felt smooth and was ready to paint.
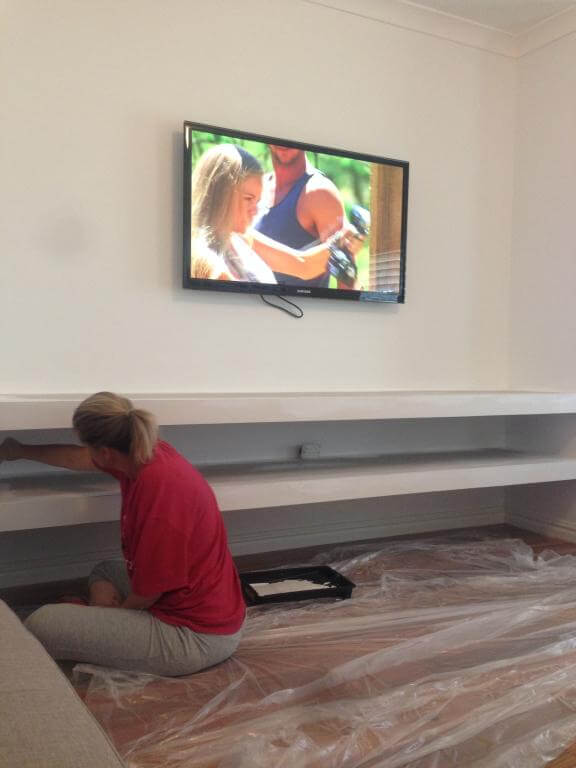
Now I switched back in to gear and got busy painting it! We all argued in our house about which type of paint to use, but we ended up going with the flat white (to match the walls and make it look seamless). I originally wanted to do them in a semi-gloss but my husband didn’t want to. Haha! He won on this one!
Here’s the finished job…
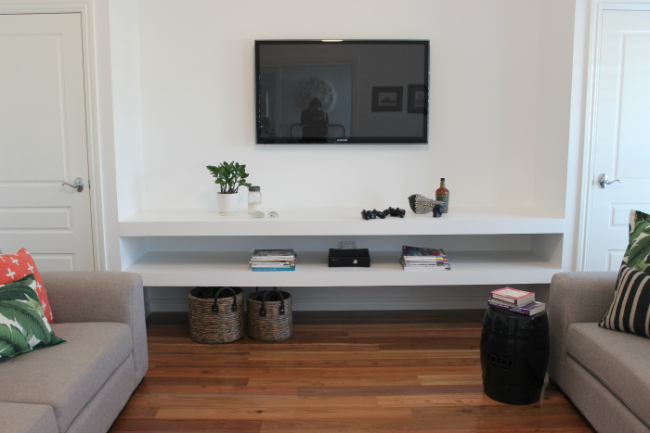
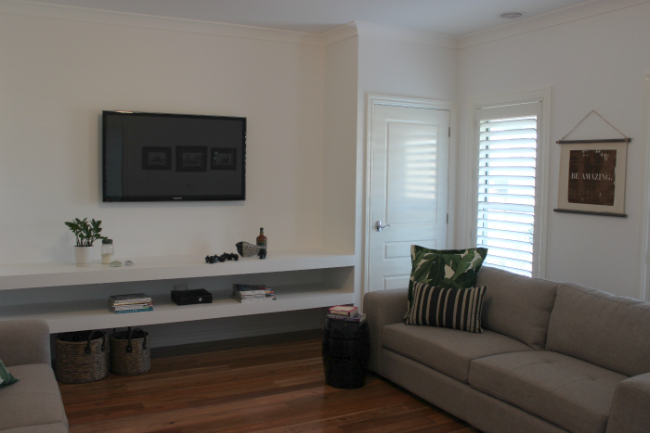
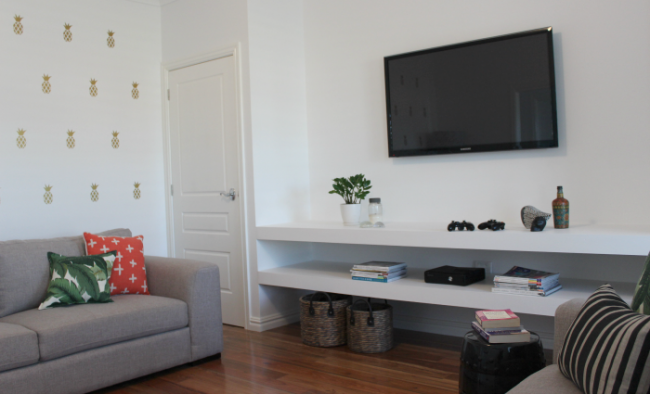
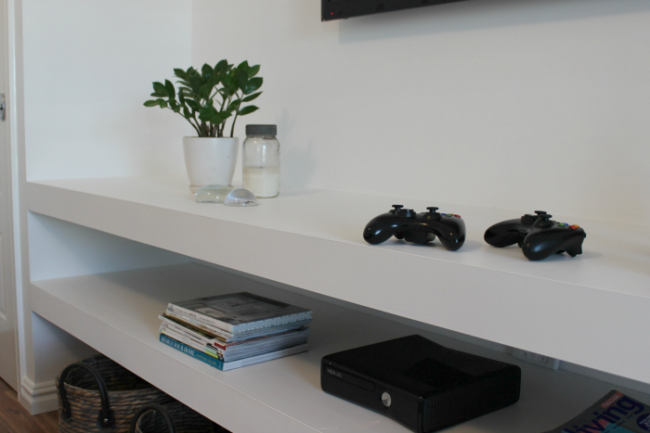
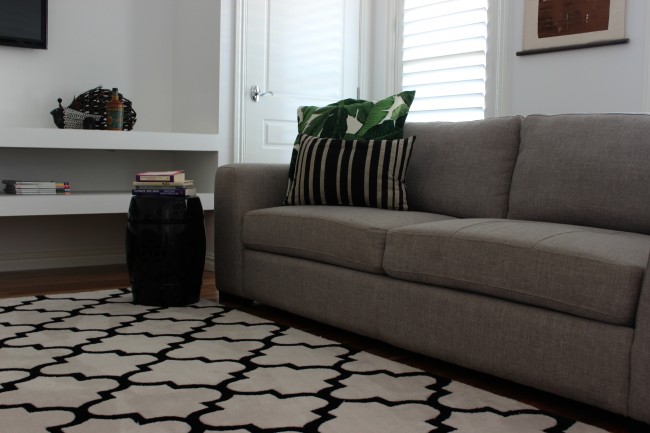
I just need to buy some nice pieces and style the shelves up! They’re rather boring at the moment 😉
GIVEAWAY TIME
I am also going to give 3 lucky readers a $50 Masters gift voucher! All you have to do is answer this question and you’re in the draw…
How would Masters help you with that DIY project you’ve always wanted to do/been putting off?
Giveaways are in accordance with my disclosure policy. Giveaway is based on skill. T & C’s are here.
CLOSED. Winners are in comments.
Be the first to read my stories
Get Inspired by the World of Interior Design
Thank you for subscribing to the newsletter.
Oops. Something went wrong. Please try again later.



Comments
Wannabe DIYer
Oh this is the perfect solution to my dilemma with floating shelves next to my fireplace! Currently have some cheap narrow ones but they don’t hold everything so well and I feel they are not long for this world!
Trish
They look fantastic Katrina, I’d like to do the same but don’t have end walls
Hayley Hogger
look at the links on her first blog about this, there are some floating shelves that have been painted to look like wood and are “just floating”.
Elizabeth Wooden
These look great! Could be the solution for my lounge room as I cant find any furniture solutions for the space that even slightly interest me!
Leanne Faulkner
Ooohhhhh…they look terrific! If I was lucky enough to win a voucher I’d head to my local Masters to complete my DIY vegie patch! They have some fantastic garden beds available – just what I need for some “me” time in the garden xx
Katrina
Hi Leanne, you’re the winner of a $50 Masters voucher! Can you email me your address details? katrina@themediamaid.com.au
Leah
Wow great plastering, that is an art for sure. My husband stinks at it (carpenter) and his catch cry (when I’m obviously being too critical) is I’m not a plasterer. He interchanges also with I’m not a painter!!
I would prob spend a masters voucher on new laundry taps or put towards the whole laundry make over. Main item we need is a free standing laundry tub.
Love your gold pineapples in this room. It’s all looking lovely.
Natalie Land
They look great. I wish I had vision like that.
Clare K
That looks fantastic!! Thanks so much for sharing this… I am going to do something very similar but i think I will get some glass cut to sit on the top to protect the surface. Very very good plastering by the way! Looks like a professional job 😉
angmac
I love the floating shelf look, I’ve done a few around our house. If I could get to Masters I would love to cover our brick wall with trellis so that I can start growing some climbing Jasmine before summer hits 🙂
Katrina
Hi tinker, you’re the winner of a $50 Masters voucher! Can you email me your address details? katrina@themediamaid.com.au
Zoe
We built 6 years ago and sad to say have only just started to do our backyard garden. So i would use the giftcard to go towards some nice plants or pots to help finish it off.
Kerri M
Hi. Long time reader…first time joiner! Masters would help me to paint my 3 year old daughter’s antique iron bed, as the first step in her long-planned beautiful “big girl” bedroom. Hmmm….Aqua, White or Coral???
Brittney
Currently we are still duct taping our bathroom tiles down how embarrassing when trying to explain that to visitors!! We have renovated the rest of the house just not the bathroom yet as it’s going to be the biggest job- and the most expensive. Any voucher towards that would sure be a great help!
Jemma Hansen
Finishing the back garden, we need some more plants.
Tracy
I have a tiny wardrobe and we are looking at turning the built in robe from the next room into ours (our girls share the main room) and then building another robe in the girls room, I need a wardrobe please help,
EmyN
We’ve just discovered we’ve got a baby on the way!! I’d love a Masters voucher to help paint our nursery and get some floating shelves and other beautiful pieces for the room. 🙂
Megan
I’d put it towards purchasing some wallpaper. I’d love to add some to the Master Bedroom as it needs an update because it’s looking sad and tired.
Katrina
Hi oneplusoneequalssix, you’re the winner of a $50 Masters voucher! Can you email me your address details? katrina@themediamaid.com.au
Hayley Hogger
I have meant to do floating shelves like these in my laundry since we built our place (12 years ago) but have always just managed without. I’d also like to do a big one over the top of the washer and dryer so I have some sorting space.
OR I could oil our MASSIVE 8x8m deck.
OR I could sand back our dining table and make a glass top to go on it.
OR I could go nuts in their outdoor cushion area and stay outside more and continue ignoring all the stuff I haven’t gotten around to in the house 🙂
Kasey Evans
I’ve been wanting to reform a timber tv cabinet into a childs kitchen for my kids this will help alot for paint, etc.
RossS12
Masters would be able to give me a kickstart on creating my own kitchen herb garden… a large pot, something to grow them in (I’m sure the good folks at Masters would advise me the best stuff for this) and then a range of herbs. I’m thinking parsley, thyme, sage and oregano for starters.
DIANA O
It’d help us fix all the things the inadequate builder has left us with, helpless and stuck in a hole not sure what to do as he won’t honour what he should be.
Mummy Ariane
Masters would encourage me to be the DIYer at home to make my family proud