Have you seen how expensive an oversized canvas is? I didn't have hundreds of dollars to spend but I wanted something large and cheap (so this meant DIY!). I had two spare canvases in my shed coincidentally. And I thought hey, I wonder if I can join them together?? I thought about this for weeks …

Have you seen how expensive an oversized canvas is? I didn’t have hundreds of dollars to spend but I wanted something large and cheap (so this meant DIY!).
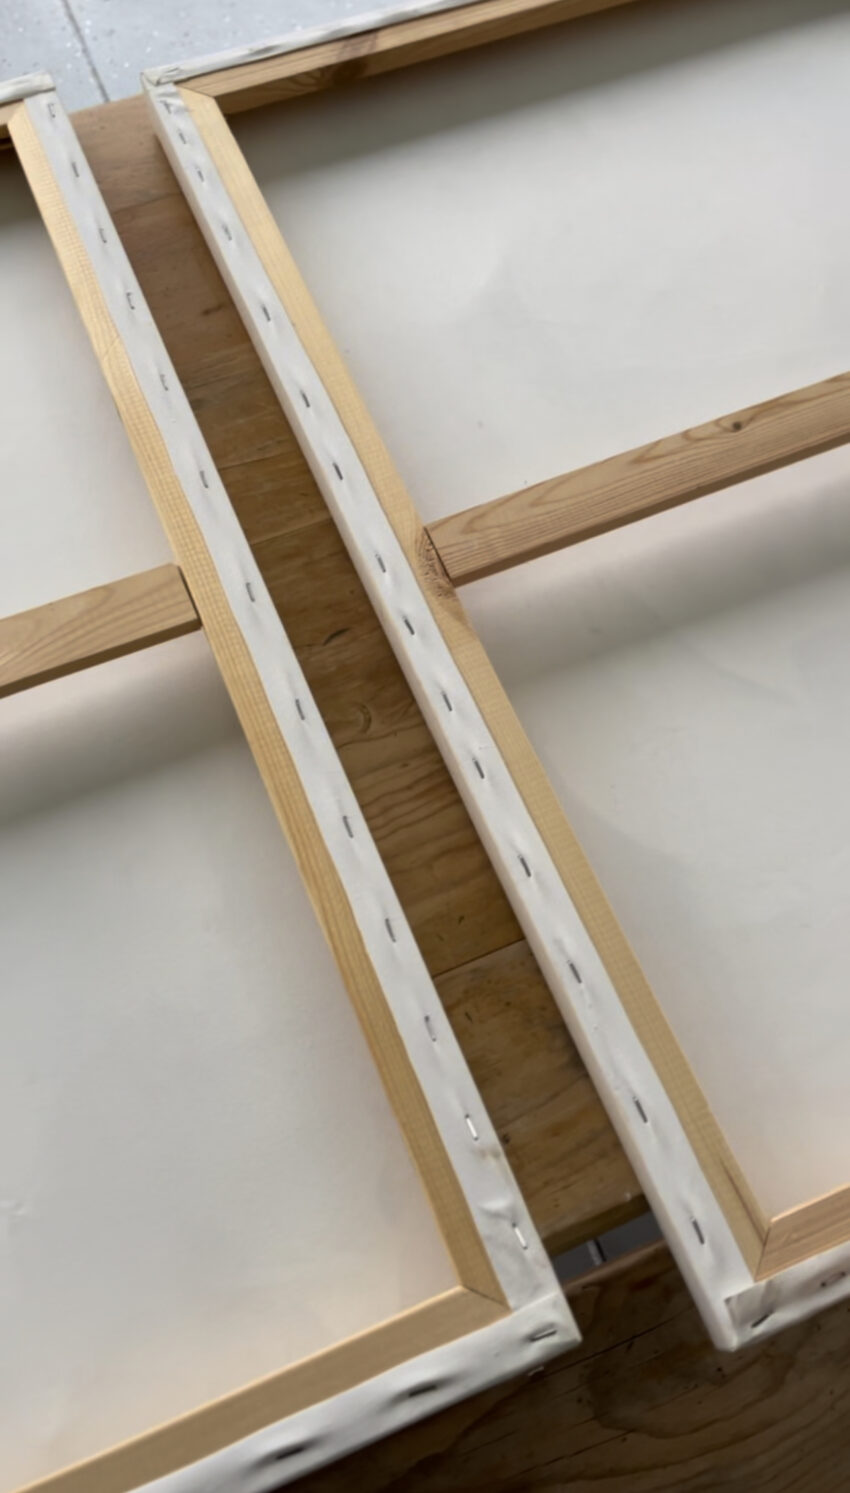
I had two spare canvases in my shed coincidentally. And I thought hey, I wonder if I can join them together?? I thought about this for weeks and easn’t sure if this was a stupid project that would end up in the skip bin.
But I think I worked it out!
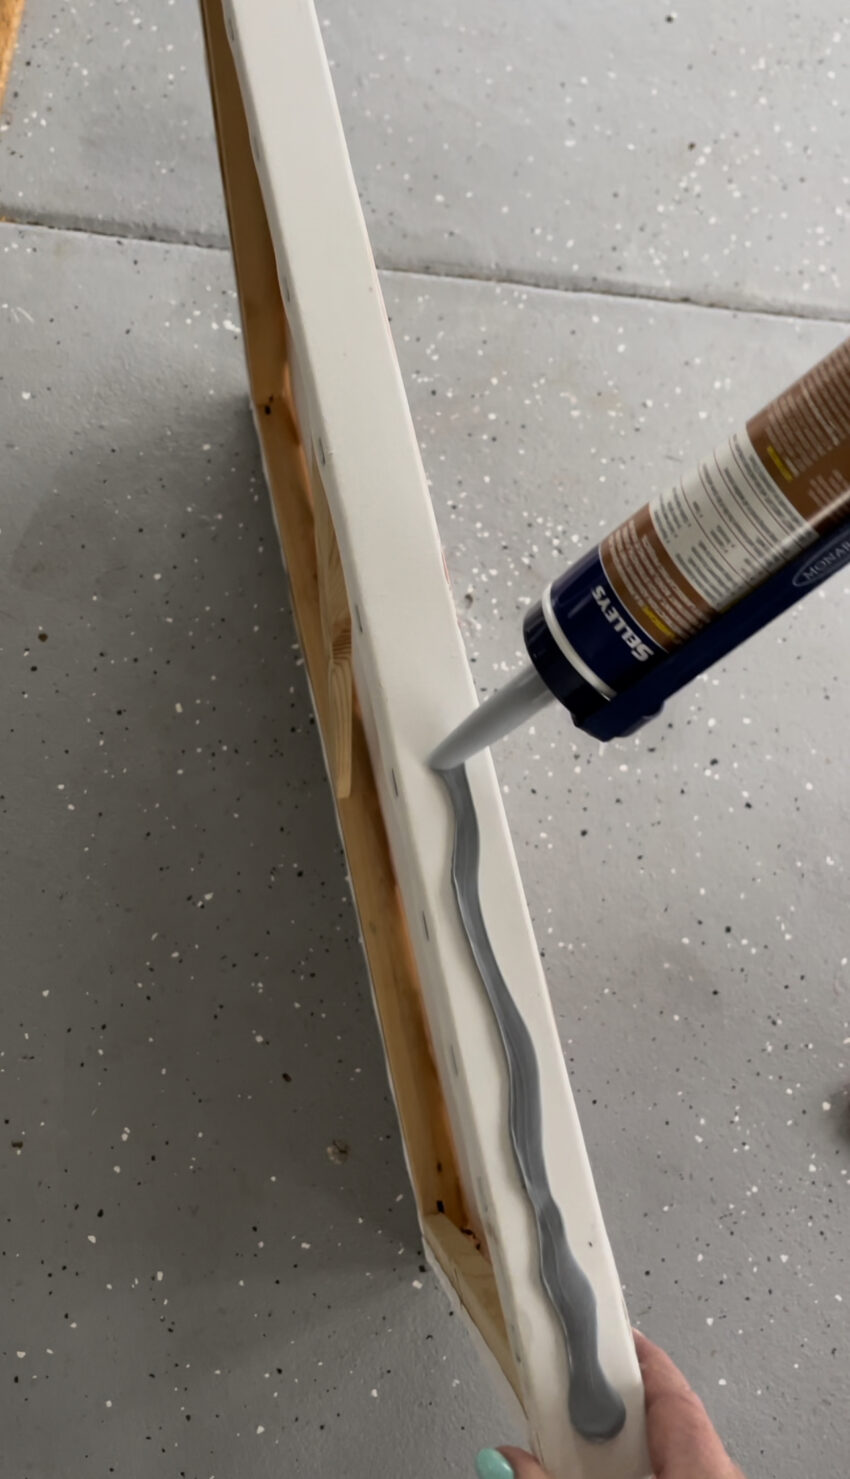
I decided to glue two canvases together and cover it in calico, so you don’t see the join…
Here are the steps for the DIY canvas project:
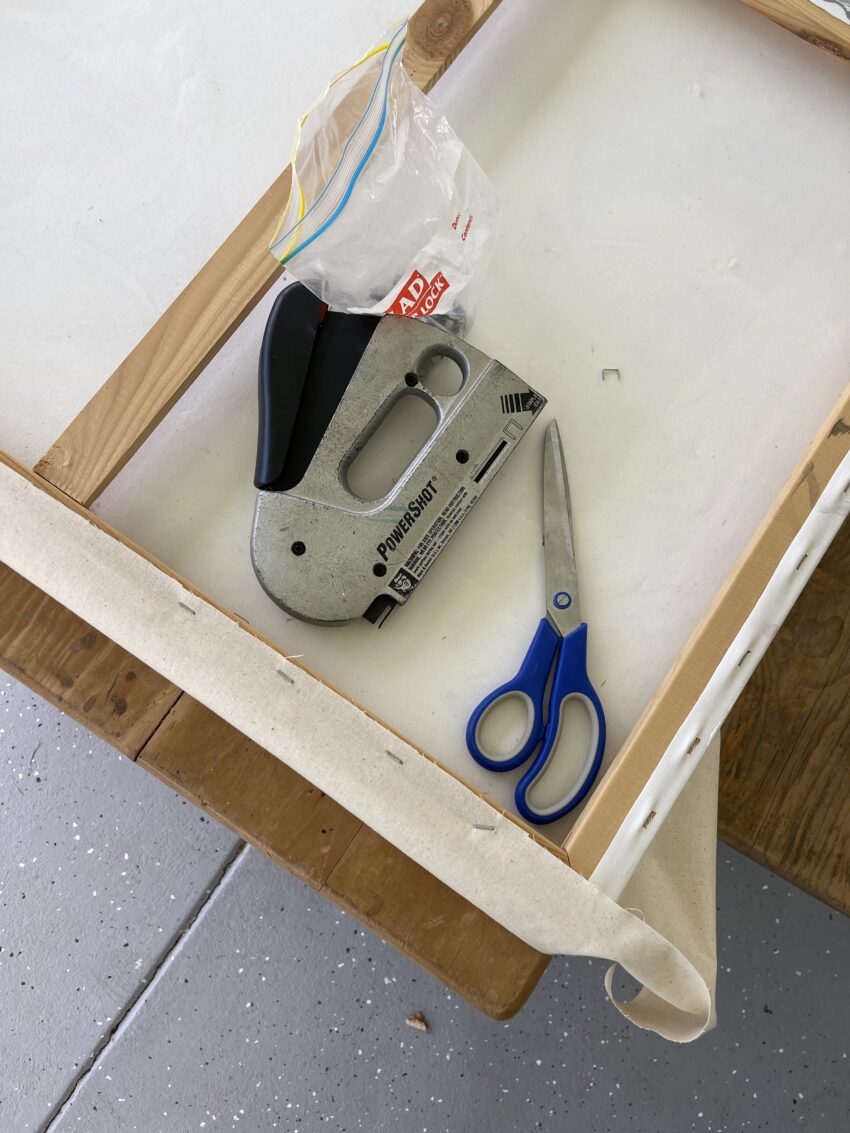
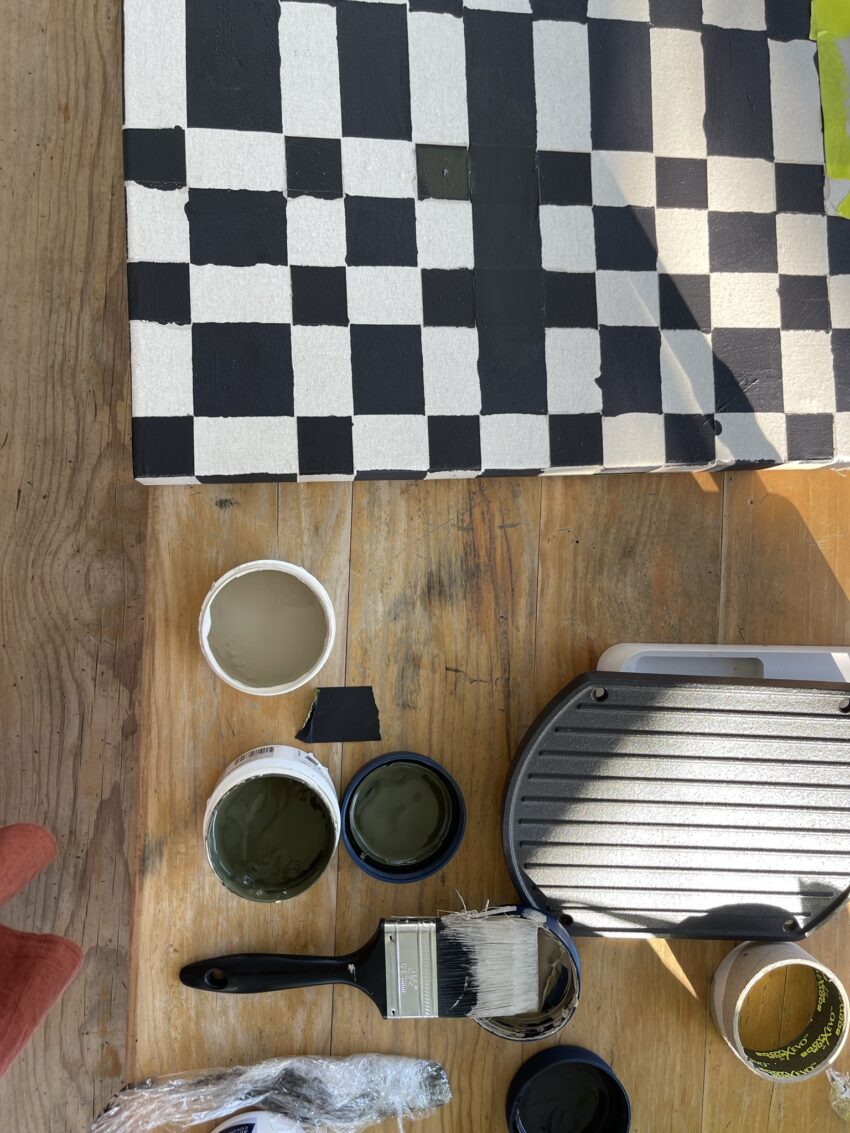
- Gather the materials: two spare canvases, heavy duty fabric, a staple gun, paint, tape.
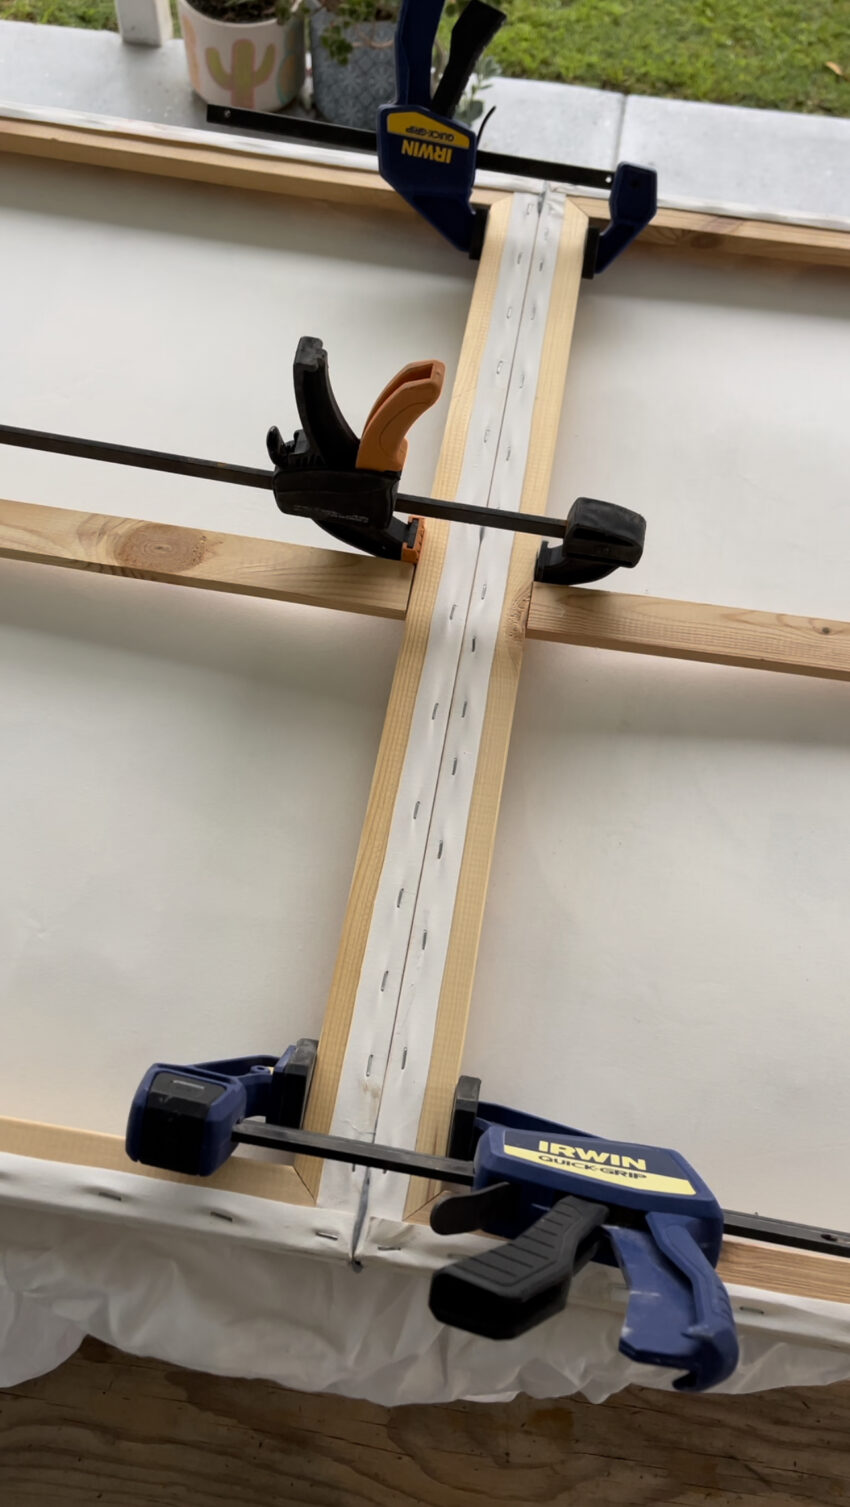
- Clamp the two canvases together and let them dry overnight.
- Purchase heavy duty fabric from a craft store like Spotlight.
- Cover the glued canvases with the heavy duty fabric using a staple gun to secure it in place.
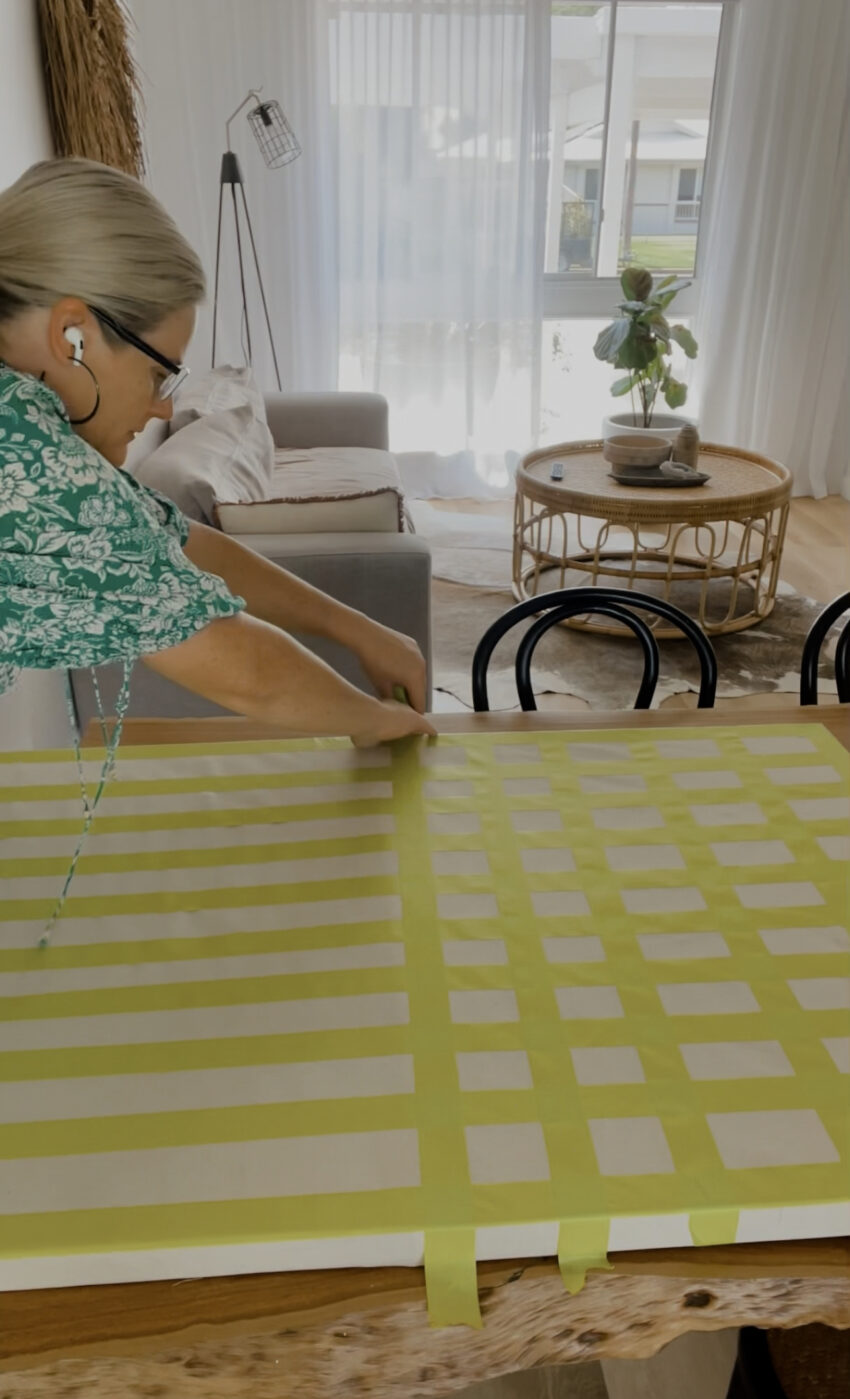
- Use tape to create a checkerboard pattern on the fabric-covered canvas.
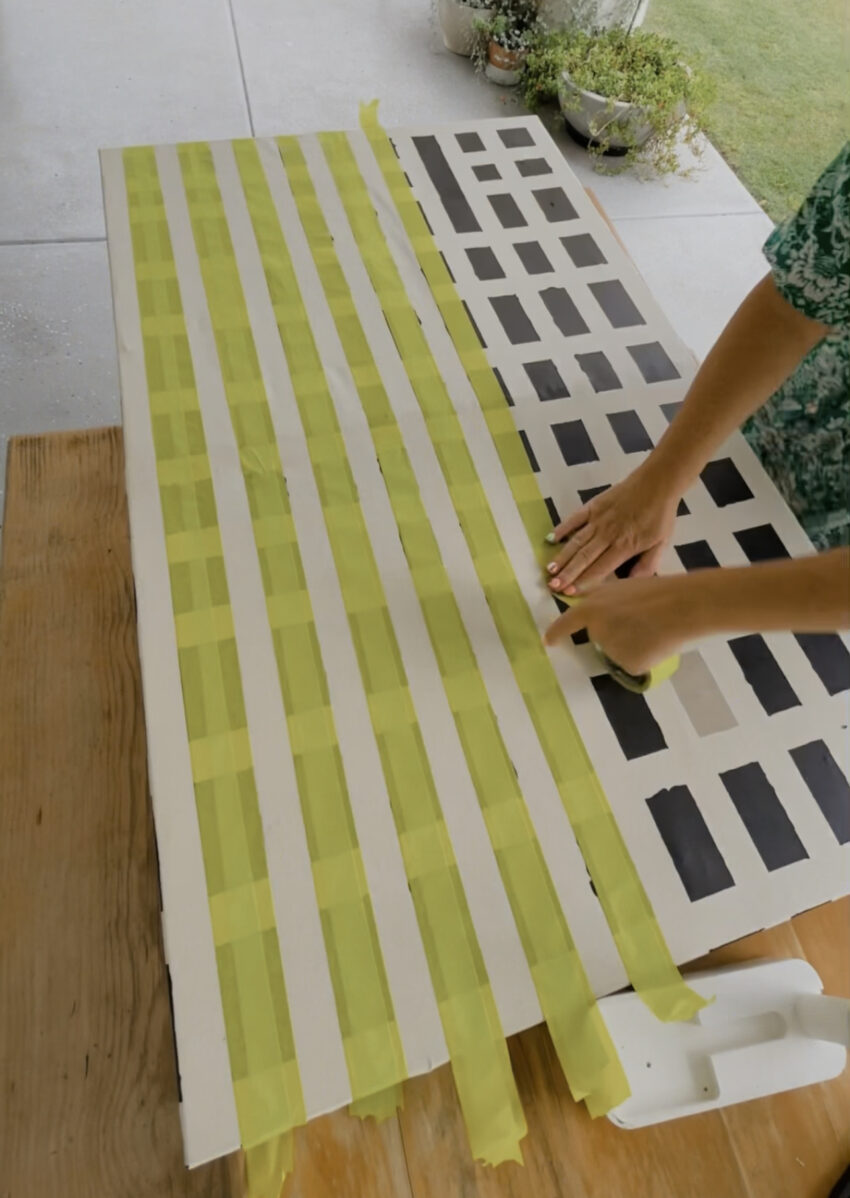
- Apply paint within the taped squares, keeping in mind that the fabric may cause the paint to bleed.
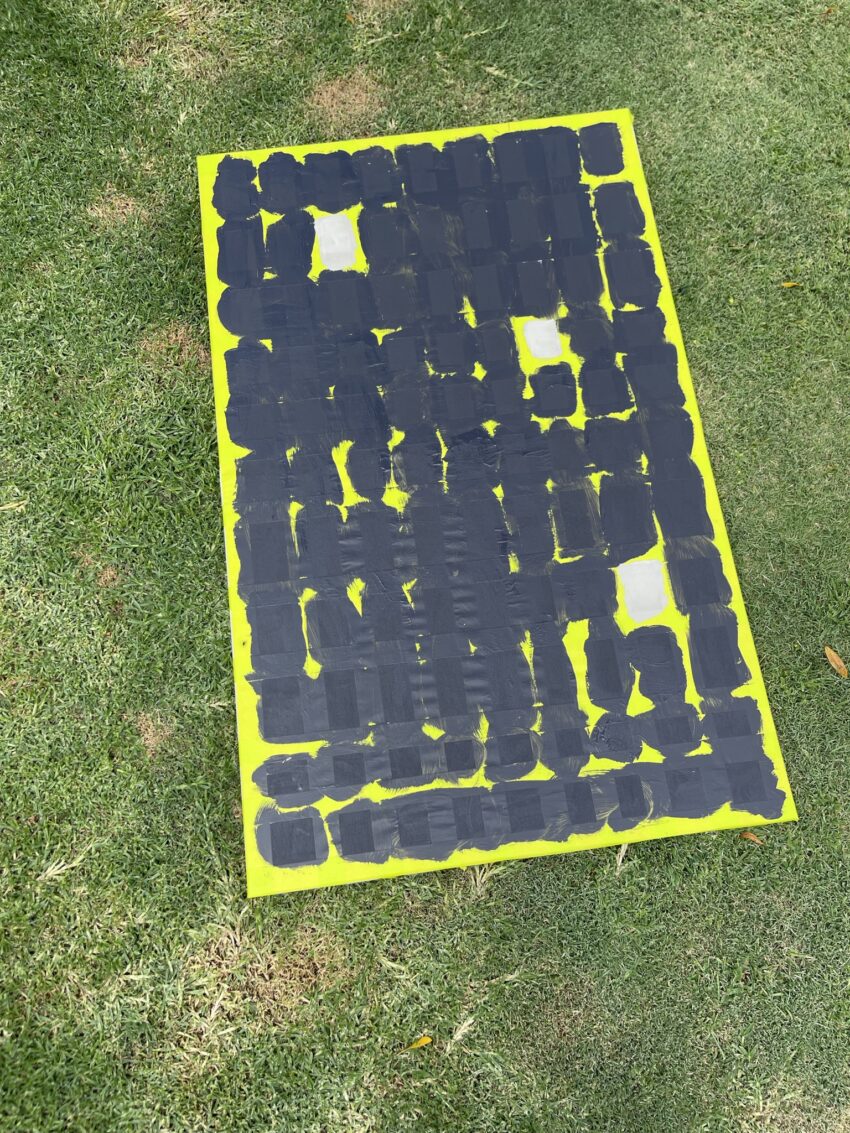
- Wait for the paint to dry, then remove the tape.
- Use new tape to create additional squares on the canvas.
- Apply more paint to the newly taped squares.
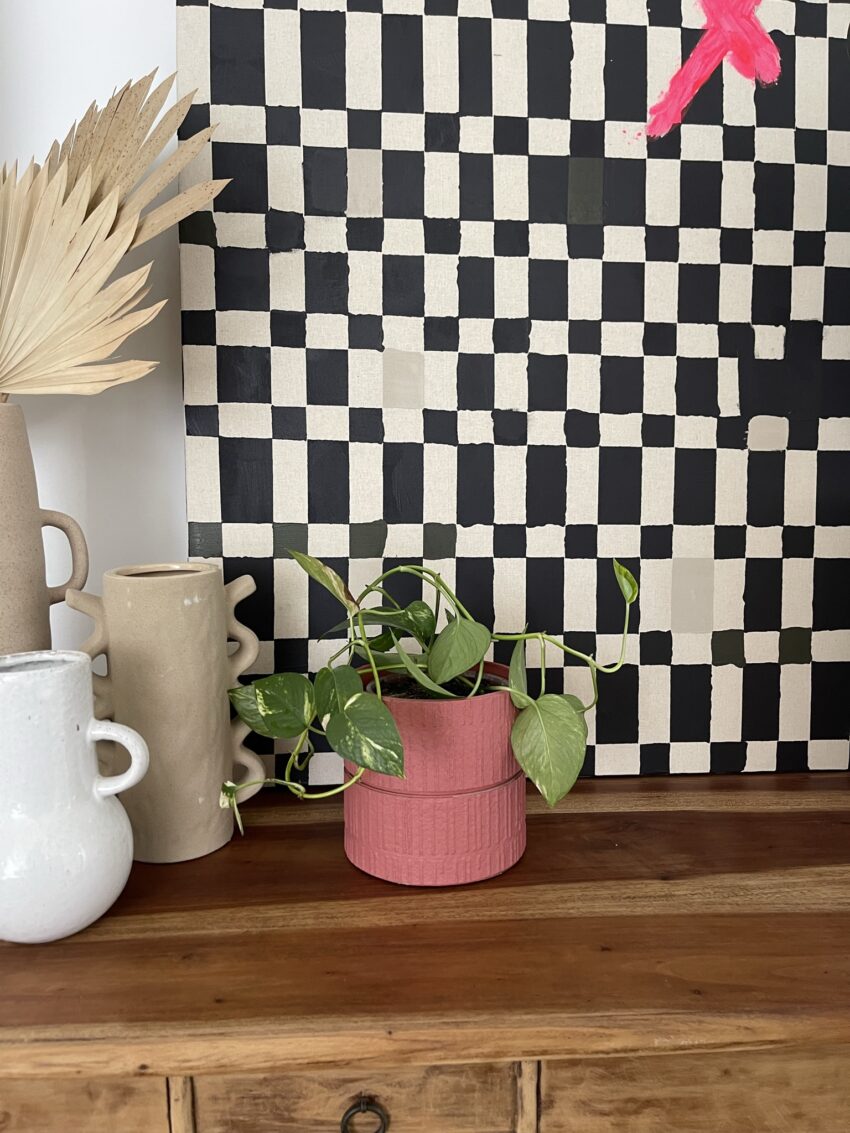
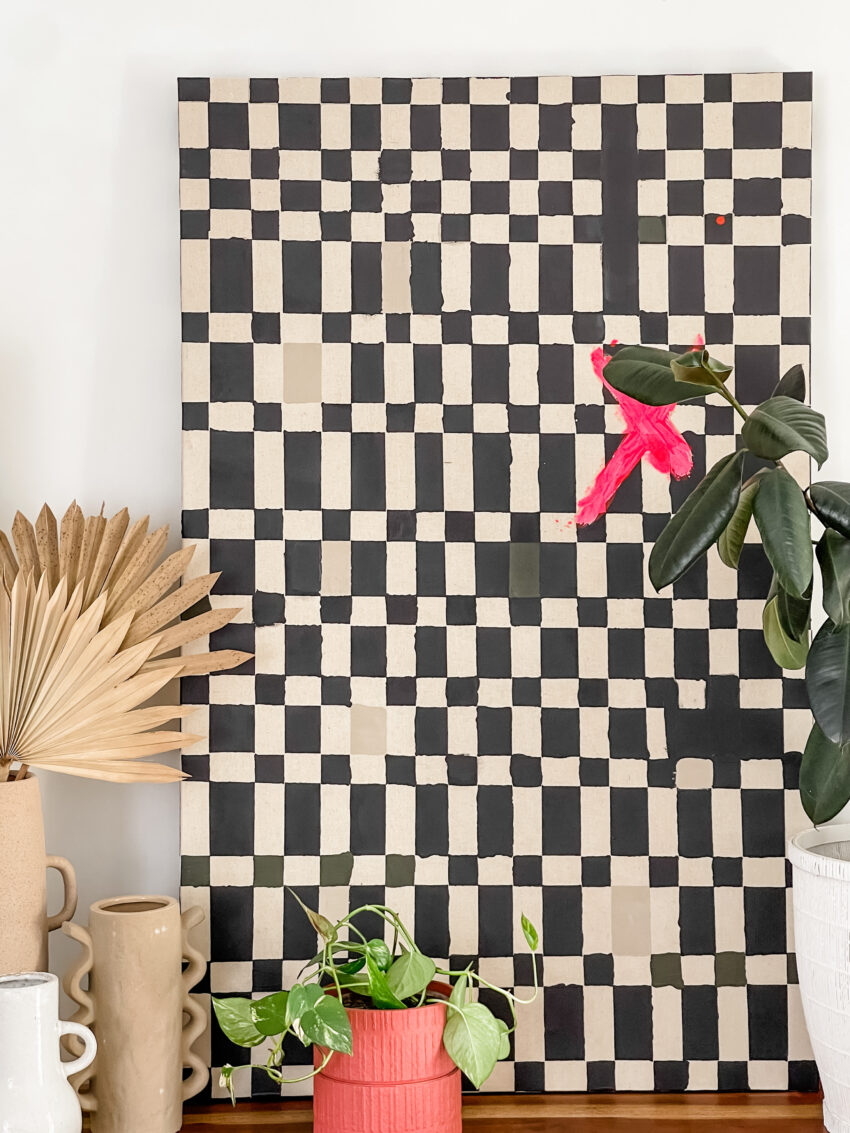
- Experiment with adding block colours and other design elements to the canvas, such as a hot pink splotch or dark green accents.
I think this will do the job for now. It looks fine in my little flip house. You might come up with a better idea! Share it with me if you do.